 General Information
Green Roofs
Rainwater Harvesting
Ponds and Wetlands
Systems
Liners
Rubber Liners
Installation
Seams
Repairs
Coatings
Protection Fabrics
Filters
Pumps
Plumbing
Fountains
Water Quality
Other Products
Documents
Energy-Efficient Building
Waterproofing

SEAMING RUBBER POND LINERS
Two sheets rubber can be permanently joined by applying Seam Tape between the sheets and Cured Repair Tape over the resulting seam as a secondary seal. For non-critical seams, such as seams between a stream and a pond, either the Seam Tape or the Cured Repair Tape can be omitted since a single tape will suffice.
seam tape |
cured repair tape |
steel roller |
SEAMING PROCEDURE: It is essential to clean the rubber with a solvent before applying tapes. For best results, use toluene. If this is not available, use white gas (Coleman fuel) or naptha. Do not use any other solvents since they may prevent proper adhesion!
Since this procedure requires that backup boards be placed under the entire seam area, it is only practical for seams less than fifteen feet long where the wood can be easily extracted. Contact us for information about making longer seams.
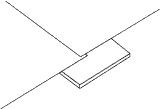
Begin by laying a plywood board (corners should
be rounded
or taped) under the area to be seamed.
Overlap the two rubber sheets at least 3".
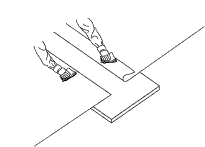
Fold back the top sheet. Wearing protective gloves, apply
solvent to one of the surfaces, scrubbing vigorously with
a plastic scouring pad. Wipe the solvent off with
a lint-free
cloth and repeat the process
until
the rubber is dark black.
Then repeat the process on the other surface.
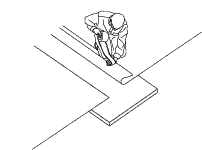
After the solvent has evaporated, apply Seam Tape to the
edge of the folded sheet. The black tape should extend
slightly past the edge of the rubber. Do not remove the
paper backing from the tape! If the tape starts to run off-track,
cut it and make a splice by overlapping at least one inch.
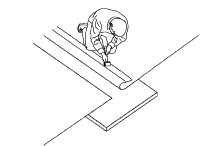
Press the paper backing with your hands in a sweeping
motion to force out air trapped beneath. Then roll
with a 2" to 3" wide roller angled 45° to the tape edge.
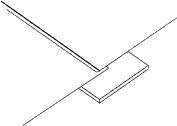
After checking to see that the bottom sheet is still
clean, flip the taped sheet back
over the other sheet.
Note that the paper backing is still in place.
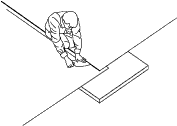
Reach under the top sheet and grab the end of the
paper backing. Pull it out slowly with one hand, pressing
the rubber with the other hand in a sweeping motion to
force out air trapped beneath the tape.
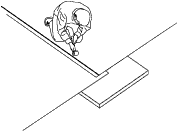
Roll the seam with the roller angled to the seam edge.
Then roll several times along the length of the seam,
leaning onto the roller to apply maximum pressure.
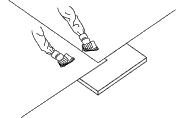
Clean at least 6" on both sides of the seam with solvent
exactly as before. Don't flood solvent near the seam
because too much can separate the tape just applied.
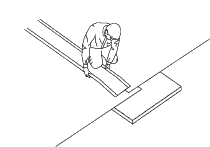
Center a 6" wide strip of Repair Tape over the
seam so that there is a 3" overlap on either side.
Then
peel back the paper backing at one end
and carefully make contact with the liner.
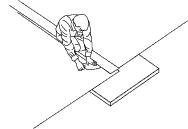
Reach under the repair tape and grab the end of the
paper backing. Pull it out slowly with one hand,
pressing the rubber with the other hand in a
sweeping
motion to force out air trapped beneath the tape.
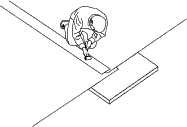
Roll the seam with the roller angled to the seam edge.
Then roll several times
along the length of the seam,
leaning onto the roller to apply maximum pressure.
Wait 24 hours before filling the pond.
PRICING: Call or email for current pricing.


