 General Information
Green Roofs
Rainwater Harvesting
Ponds and Wetlands
Energy-Efficient Building
Waterproofing
EPDM Roofing
Acrylic Roofing
Preparation
Basic Procedure
Inside Corners
Outside Corners
Skylights
Posts
Pipes and Drains
Documents
ACRYLIC ROOFING: BASIC PROCEDURE
Before beginning the following procedure, prepare the roof as described on the preceding pages. Next, if there are any inside corners, outside corners, skylights, pipes, or drains, flash as described later in this manual. Finally, apply acrylic as described below.
To achieve adequate membrane thickness, it is essential to apply at least one gallon of Conservation Technology Acrylic for every 20 square feet of roof surface. Although the following procedure describes a four-coat process, additional coats may be necessary to apply the proper quantity of acrylic.
STEP 1: Attach a metal drip flashing at the roof edge. Select
a flashing without a raised lip that can restrict water runoff.
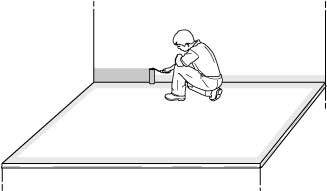
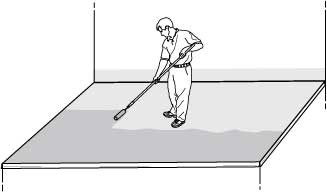
STEP 2: Apply a heavy coat of acrylic
over the flashing and onto the roof surface.
STEP 3: Embed 6" reinforcing fabric in the wet acrylic,
stopping approximately 1/2" short of the roof edge.
STEP 4: Roll a second coat of acrylic on top,
completely saturating the fabric.
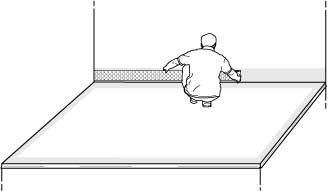
STEP 5: Using a short roller, apply a coat of acrylic at least
4" up the wall and 4" onto the adjacent roof surface.
STEP 6: Embed 6" fabric into the wet acrylic so that it
extends 3" up the wall and 3" onto the roof surface.
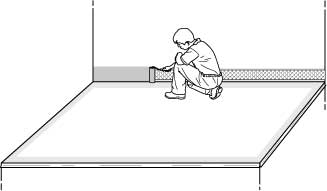
STEP 7: Roll a second coat of acrylic
on top, completely saturating the fabric.
STEP 8: Using a full-length roller, re-apply acrylic over the
wall fabric and continue upward to the desired flashing height.
STEP 9: Embed a strip of fabric in the wet acrylic,
overlapping the first fabric by at least an inch.
STEP 10: Roll a coat of acrylic on
top, completely saturating the fabric.
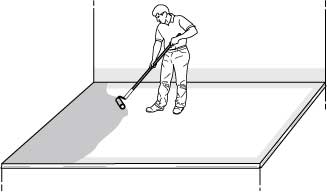
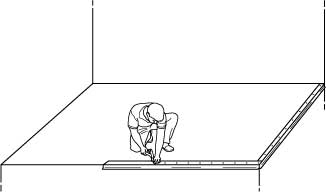
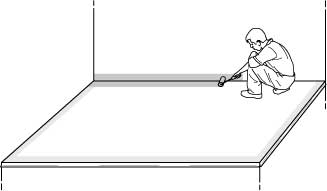
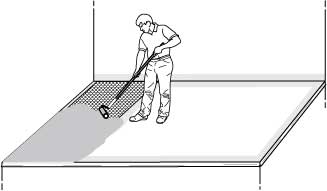
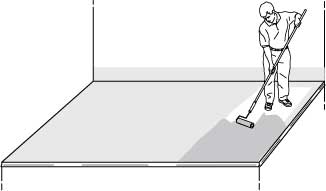
STEP 11: Apply a heavy coat of acrylic to the roof
surface, extending approximately 44" from one end.
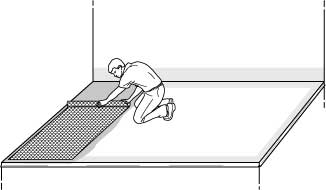
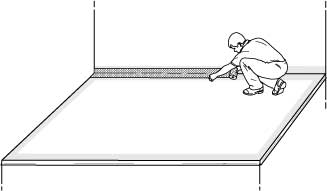
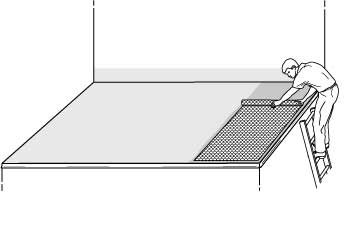
STEP 12: Unroll 40" fabric into the wet acrylic,
making sure there are no wrinkles or bubbles.
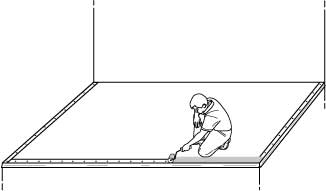
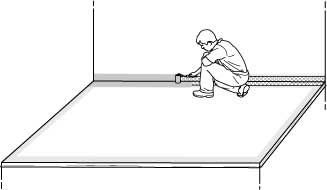
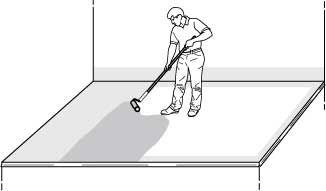
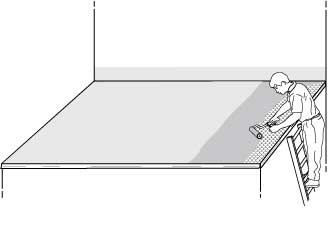
STEP 13: Top-coat with a heavy coat of
acrylic, completely saturating the fabric.
STEP 14: Apply acrylic 40" beyond the edge of
the
fabric, and re-apply acrylic over the last 6" of fabric.
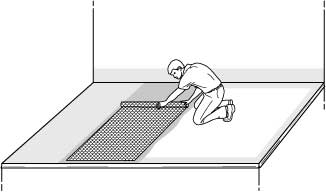
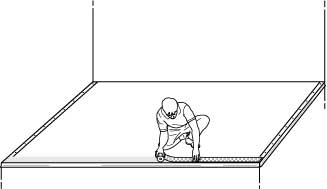
STEP 15: Immediately embed 40" fabric into the
wet acrylic, overlapping the first fabric by 3" to 4".
STEP 16: Top-coat with a heavy coat
of acrylic, completely saturating the fabric.
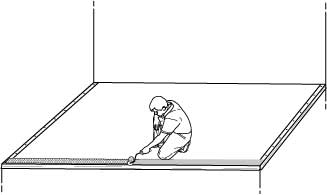
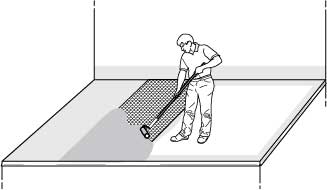
STEP 17: Continue the process of layering
acrylic-fabric-acrylic, reaching the other end of the roof.
STEP 18: Trim the final fabric so that it will extend just
short of the roof edge, and unroll it into the wet acrylic.
STEP 19: Top-coat with a heavy coat of
acrylic, completely saturating the fabric.

STEP 20: Wait at least 24 hours for the base
coats to dry. Then apply the first finish coat.
STEP 21: After the first finish coat has dried,
apply the second finish coat perpendicular to first.
STEP 22: After five years, pressure wash, inspect the
roof, and repair any problem areas with acrylic and fabric...

...Then apply a maintenance coat of acrylic at the rate of
one gallon for every 80 square feet of roof and flashing.