 General Information
Green Roofs
Rainwater Harvesting
Ponds and Wetlands
Energy-Efficient Building
Waterproofing
EPDM Roofing
Acrylic Roofing
Preparation
Basic Procedure
Inside Corners
Outside Corners
Skylights
Posts
Pipes and Drains
Documents

ACRYLIC ROOFING: PIPES AND DRAINS
Acrylic bonds well to most plastic or metal pipes. However, never flash directly to metal chimney or flue pipes: always fasten the appropriate ventilated metal flashing to the roof and and apply acrylic and fabric to the flashing. Follow these procedures just before beginning to waterproof the main roof surface.

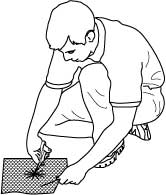
STEP 1: Caulk any voids in the
corner and tool a cove in the caulk.
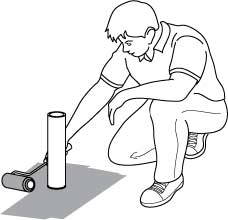
STEP 2: Using scissors, cut radial slits in
the center of a square piece of fabric.
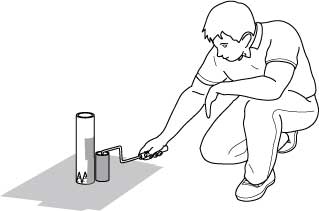
STEP 3: Apply acrylic to the roof
surface and several inches up the pipe.
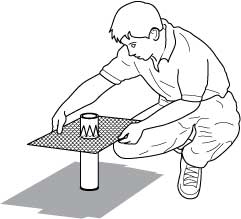
STEP 4: Lower the fabric over the
pipeand embed it into the wet acrylic.
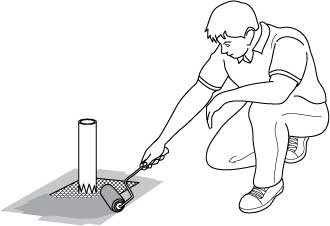
STEP 5: Topcoat the fabric
with a heavy coat of acrylic.
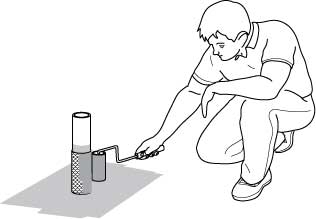
STEP 6: Apply acrylic to
the remainder of the pipe.
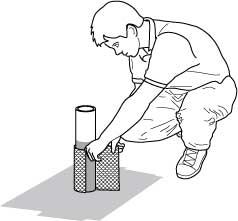
STEP 7: Wrap fabric around the pipe,
overlapping the slits in the base fabric.
STEP 8: Top-coat the fabric wrapping
the pipe with a heavy coat of acrylic.
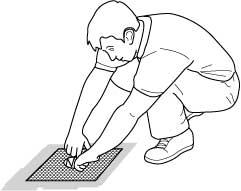
Acrylic can be bonded directly into roof drains, but it is better to bond to a wide drain flange. Follow these procedures just before beginning to waterproof the main roof surface.
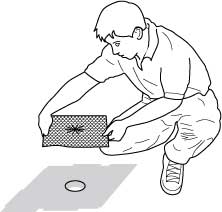
STEP 1: For bottom drains, cut slits in a
square of fabric and embed it into acrylic.
STEP 2: Press the fabric slits against
theacrylic-coated interior of the pipe.
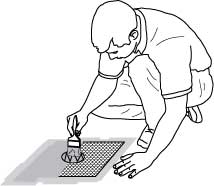
STEP 3: Top-coat the fabric, extending
well into the interior of the pipe.