 General Information
Green Roofs
Rainwater Harvesting
Ponds and Wetlands
Energy-Efficient Building
Waterproofing
EPDM Roofing
Acrylic Roofing
Preparation
Basic Procedure
Inside Corners
Outside Corners
Skylights
Posts
Pipes and Drains
Documents

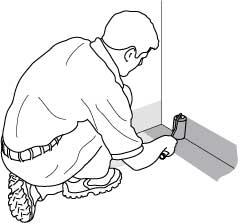
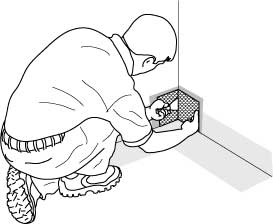
ACRYLIC ROOFING: INSIDE CORNERS
The intersection of two vertical walls with a roof is called an "inside corner" if the walls intersect at an angle measuring less than 180°. Although the illustrations show a 90° angle, the same procedure works for other angles. Follow these procedures just before beginning to waterproof the main roof surface.
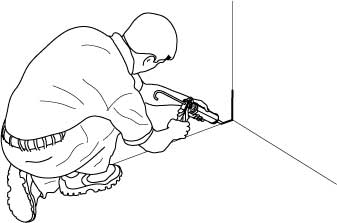
STEP 1: Caulk any voids in the
corner and tool a cove in the caulk.
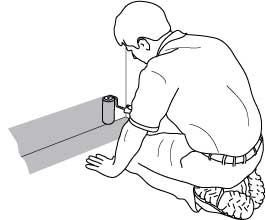
STEP 2: Apply a coat of acrylic 4"
up
one wall and 4" out onto the roof.
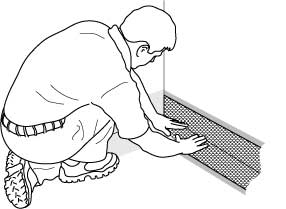
STEP 3: Embed 6" fabric in the wet
acrylic,half on the wall and half on the roof.
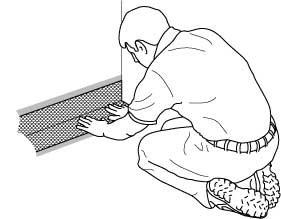
STEP 4: Topcoat the fabric
with a heavy coat of acrylic.
STEP 5: Apply acrylic 4" up the
second wall and 4" out onto the roof.
STEP 6: Embed 6" fabric in the wet acrylic,
half on the wall and half on the roof.
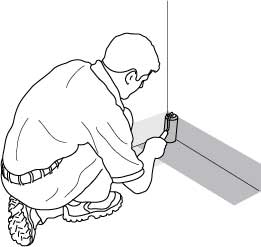
STEP 7: Topcoat the second fabric
with a heavy coat of acrylic.
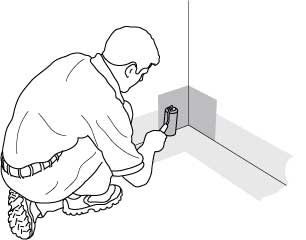
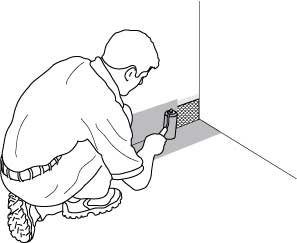
STEP 8: Recoat 4" from either side of
the corner and 8" up from the roof.
STEP 9: Embed 6" x 6" fabric in
the wet acrylic, half on each wall.
STEP 10: Topcoat the corner
fabric
with a heavy coat of acrylic.

STEP 11: Dab the corner with a paint
brush to remove any puddles of acrylic.