 General Information
Green Roofs
Rainwater Harvesting
Ponds and Wetlands
Energy-Efficient Building
Waterproofing
EPDM Roofing
Preparation
Basic Procedure
Multiple Walls
Details
Folded Inside Corners
Molded Inside Corners
Taped Inside Corners
Molded Outside Corners
Taped Outside Corners
Posts
Skylights
Outside Edges
Inside Edges and Sills
Edge Transitions
Pipe Boots
Curved Penetrations
Roof Drains
Scupper Drains
Overlap Seams
Butt Seams
Edges
Coverings
Components
Acrylic Roofing
Documents

EPDM ROOFING: MOLDED INSIDE CORNERS
Molded Inside Corners should be used where inside corners are permanently exposed, or where additional flashing must be applied above. We pre-apply seam tape to the horizontal flanges which extend 5” onto the roof and to the vertical flanges which extend 8” up the walls. Follow the first eight steps for Folded Inside Corners before beginning the procedures shown here. Position the corners carefully and work slowly to avoid creating gaps at the intersections of the roof and walls.
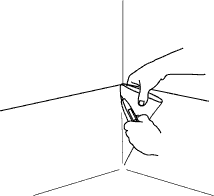
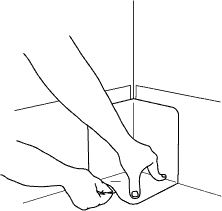
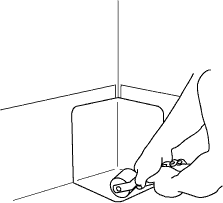
STEP 1: Cut off the “ear” close to
the corner with a sharp utility knife.
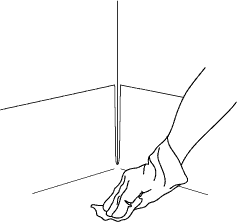
STEP 2: Clean all surfaces with
toluene, naptha, or white gasoline.
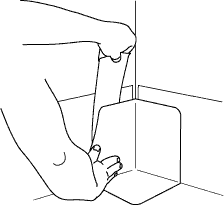
STEP 3: Peel back the protection paper
to expose the tape at the bottom corner.
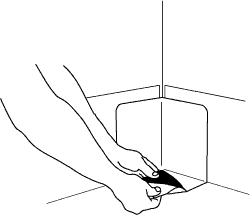
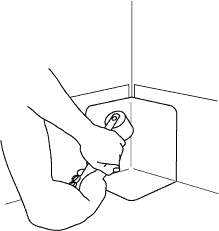
STEP 4: Holding the corner firmly in
place, press to tack the corner to the roof.
STEP 5: Reach under and pull the
protection paper towards the wall.
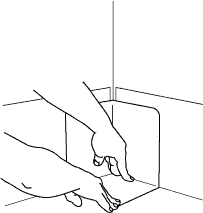
STEP 6: Press the molded corner firmly
into the roof corner and continue pulling.
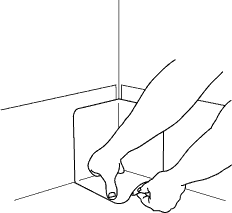
STEP 7: Reach under and pull the
protection paper towards the wall.
STEP 8: Press the molded corner firmly
into the roof corner and continue pulling.
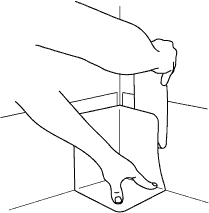
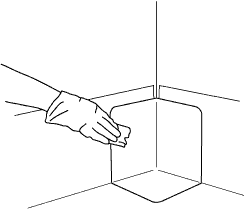
STEP 9: Roll the base firmly,
especially at the roof corners.
STEP 10: Roll the walls firmly,
especially at the roof corners.
STEP 11: Clean the edges with
toluene, naptha, or white gasoline.
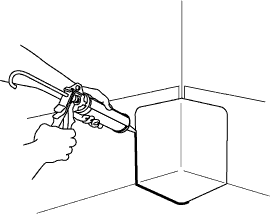
STEP 12: Caulk around the molded
corner with Silicone Caulk for EPDM