 General Information
Green Roofs
Rainwater Harvesting
Ponds and Wetlands
Energy-Efficient Building
Waterproofing
EPDM Roofing
Preparation
Basic Procedure
Multiple Walls
Details
Folded Inside Corners
Molded Inside Corners
Taped Inside Corners
Molded Outside Corners
Taped Outside Corners
Posts
Skylights
Outside Edges
Inside Edges and Sills
Edge Transitions
Pipe Boots
Curved Penetrations
Roof Drains
Scupper Drains
Overlap Seams
Butt Seams
Edges
Coverings
Components
Acrylic Roofing
Documents

EPDM ROOFING: EDGE TRANSITIONS
TAPED FLUSH TRANSITION: A flush transition is created at the intersection between a roof and a wall where the two surfaces are flush. To fold the rubber up the wall and over the roof edge at the same time, the roof membrane must be slit at the corner. A square of Uncured Laminate Tape is folded in half with the taped side out and positioned to overhang the roof edge a few inches. The tape is unfolded to make contact with the wall and is then stretched and formed over the corner.
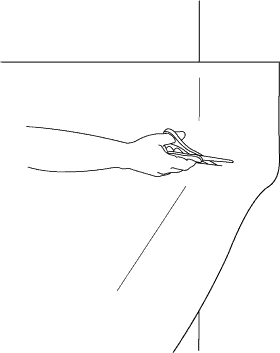
STEP 1: Slit the
rubber 90° to the roof.
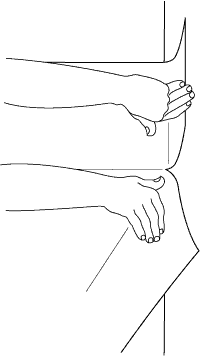
STEP 2: Fold the rubber
down and around the wall.
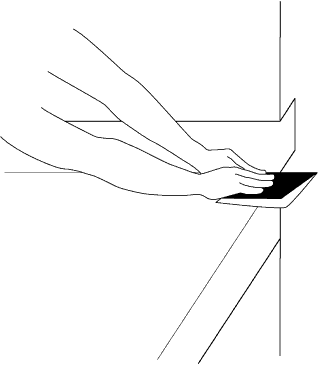
STEP 3: Fold a square of Uncured
Laminate Tape and place it in the corner.
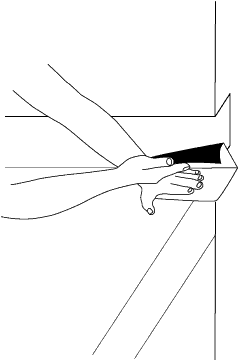
STEP 4: Lift the tape to
make contact with the wall.
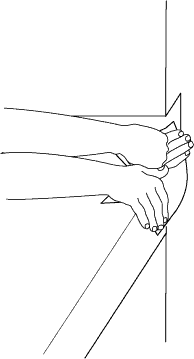
STEP 5: Form the tape over the edge so
that it stretches and bonds to all surfaces
TAPED PROJECTED TRANSITION: A flush transition is created at the intersection between a roof and a wall where the wall extends beyond the roof. To fold the rubber up the wall and over the roof edge at the same time, the roof membrane must be slit at the corner. A square of Uncured Laminate Tape is folded in half with the taped side out and positioned to overhang the roof edge a few inches. The tape is unfolded to make contact with the wall and is then stretched and formed over the corner.
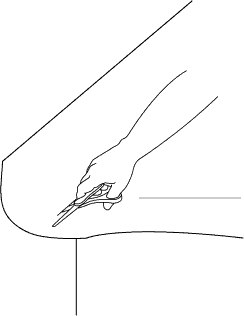
STEP 1: Slit the
rubber
90° to the roof.
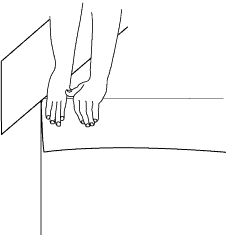
STEP 2: Fold the rubber
down and onto the wall.
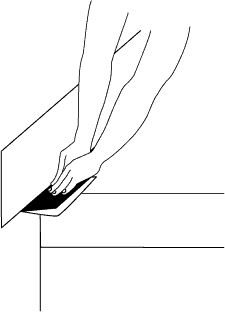
STEP 3: Fold a square of Uncured
Laminate Tape and place it in the corner
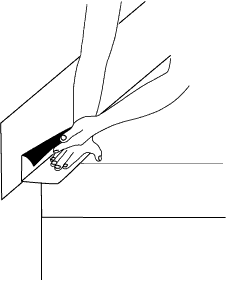
STEP 4: Lift the tape to
make contact with the wall.
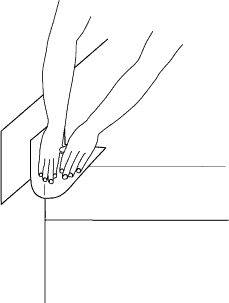
STEP 5: Form the tape over the edge so
that it stretches and bonds to all surfaces