 General Information
Green Roofs
Rainwater Harvesting
Ponds and Wetlands
Energy-Efficient Building
Waterproofing
EPDM Roofing
Preparation
Basic Procedure
Multiple Walls
Details
Folded Inside Corners
Molded Inside Corners
Taped Inside Corners
Molded Outside Corners
Taped Outside Corners
Posts
Skylights
Outside Edges
Inside Edges and Sills
Edge Transitions
Pipe Boots
Curved Penetrations
Roof Drains
Scupper Drains
Overlap Seams
Butt Seams
Edges
Coverings
Components
Acrylic Roofing
Documents

EPDM ROOFING: MULTIPLE WALLS
The following illustrations show how to modify the BASIC PROCEDURE to waterproof a roof with two sides open and two sides intersecting walls. Similar techniques apply for roofs with walls on three or four sides. Since it is very difficult to adhere two adjacent walls at the same time, the rubber is pre-folded so that one wall can be adhered at a time. When the corners are folded, extra hands are essential to avoid stretching or premature rubber-to-rubber contact.
As before, the procedures show the rubber fully adhered to the roof surface, but when the rubber is to be covered with materials weighing at least five pounds per square foot it is only necessary to adhere the first few feet in from the edges, up the walls, and over the edges. Don’t assume that surrounding a roof with walls will eliminate the need to adhere a roof: wind flowing over the walls often increases uplift forces! The application of Termination Tape and Termination Bars is the same as before, so it is not shown.
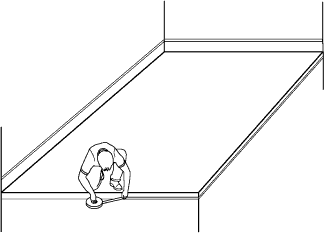
STEP 1: Apply Termination Tape to the
walls, roof edges, and vertical transitions.
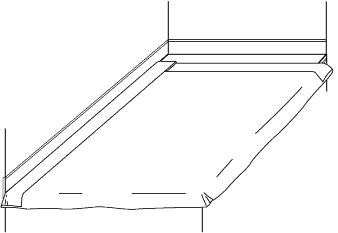
STEP 2: Position the sheet by folding back the short side
one foot from the wall Then fold the long side over top.
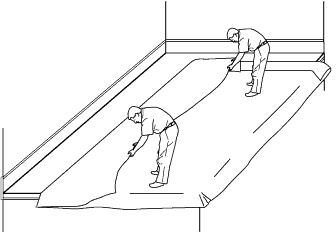
STEP 3: After the rubber has “relaxed” for at least an hour,
pull back long side, leaving the short side folded beneath.
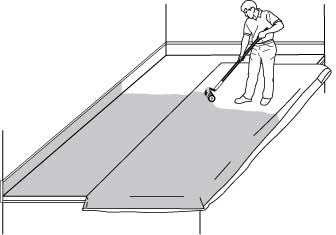
STEP 4: Apply Bonding Adhesive to
the exposed rubber, roof, and wall.
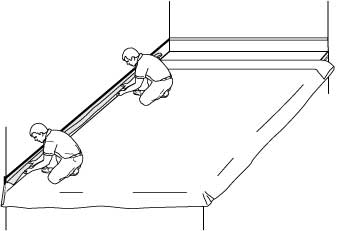
STEP 5: Push the rubber back, press it into the
corner, and lift it up the wall, avoiding creases.
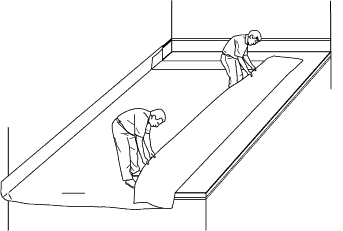
STEP 6: Fold back the other long side,
leaving the short side folded beneath.
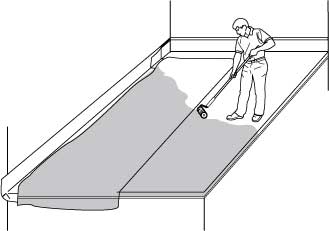
STEP 7: Apply Bonding Adhesive
to the exposed rubber and roof.
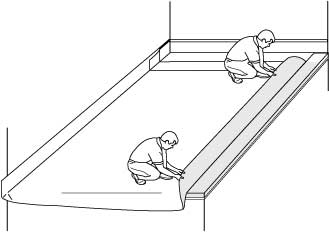
STEP 8: After the adhesive is dry, carefully push back the
sheet. To prevent wrinkles, avoid creasing in the leading edge.
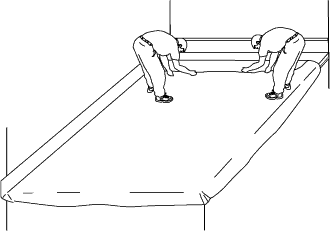
STEP 9: Pull back firmly on the short side until the
adhesive already applied prevents further movement.
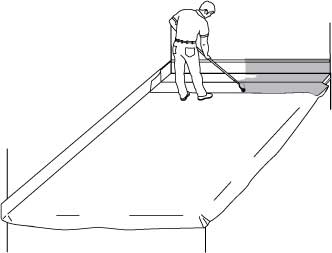
STEP 10: Apply Bonding Adhesive to
the remaining rubber, roof, and side wall.
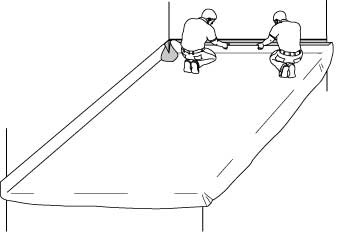
STEP 11: Push back short side, leaving an “ear” at the corner. See
FOLDED INSIDE CORNERS or MOLDED INSIDE CORNERS.