 General Information
Green Roofs
Rainwater Harvesting
Ponds and Wetlands
Energy-Efficient Building
Waterproofing
EPDM Roofing
Preparation
Basic Procedure
Multiple Walls
Details
Folded Inside Corners
Molded Inside Corners
Taped Inside Corners
Molded Outside Corners
Taped Outside Corners
Posts
Skylights
Outside Edges
Inside Edges and Sills
Edge Transitions
Pipe Boots
Curved Penetrations
Roof Drains
Scupper Drains
Overlap Seams
Butt Seams
Edges
Coverings
Components
Acrylic Roofing
Documents

EPDM ROOFING: SKYLIGHTS
With careful preparation, skylight sidewalls can be flashed with the same rubber sheet as the roof. Before the rubber roof is installed, frame the skylight openings and cut out the sheathing over the openings. Then re-install the cut panel on temporary wood blocking to cover the openings. When the rubber sheet is installed, apply adhesive to the back of the rubber as usual, but do not apply adhesive over the skylight panel. Poke holes through the four corners of the opening and carefully cut a small round circle at each hole to prevent tearing. Then follow the illustrated procedures. As an alternative, the skylight corners could also be taped (see TAPED OUTSIDE CORNERS).
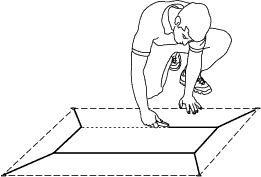
STEP 1: Mark and cut four flaps slightly wider than the
height of the skylight curb and with 45° corner slits.
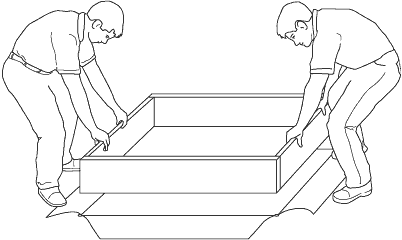
STEP 2: Fold back the four flaps and lower
the skylight curb into positon.

STEP 3: Apply Termination Tape around the top edge of
the curb. Do not remove the protective paper.
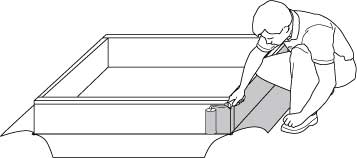
STEP 4: Apply Bonding Adhesive to the exposed rubber
and the skylight curb using a narrow paint roller.
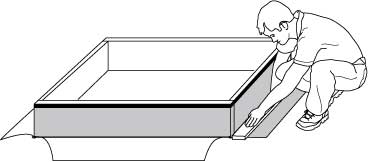
STEP 5: Using a clean board, press the rubber firmly
into the corner where the roof and curb meet.
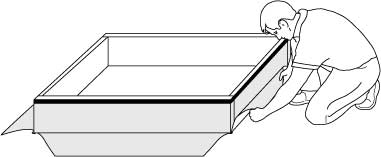
STEP 6: Strip the release paper from the tape and
lift the sheet, pressing it into the adhesive and tape.
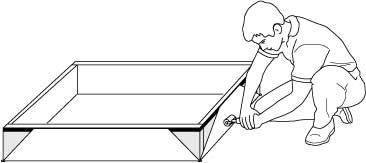
STEP 7: Firmly roll the rubber on
the curb
to insure a good bond.
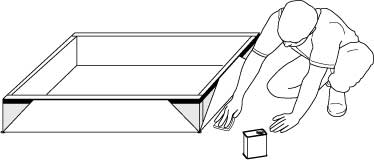
STEP 8: Clean all surfaces with
toluene, naptha, or white gasoline.
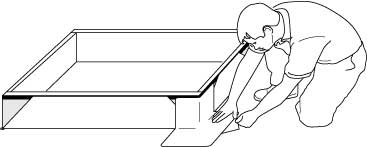
STEP 9: Install four molded inside corners, following
the instructions for MOLDED OUTSIDE CORNERS.
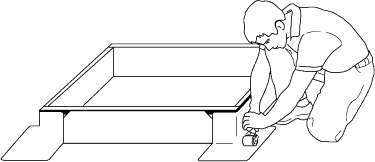
STEP 10: Roll all surfaces of the
molded corners and skylight sidewalls.
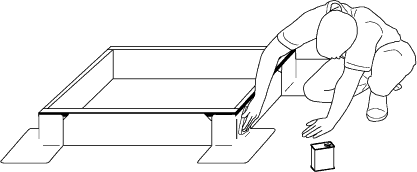
STEP 11: Clean all surfaces with
toluene, naptha, or white gasoline.
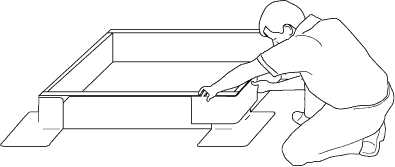
STEP 12: Overlap a strip of Cured Laminate Tape to seal
the triangular areas not covered by the molded corners.
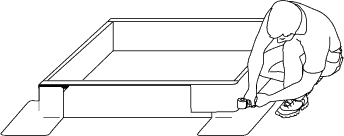
STEP 13: Roll all surfaces firmly,
especially at the roof corners.
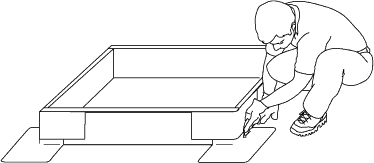
STEP 14: Clean the edges
one
final time before caulking.
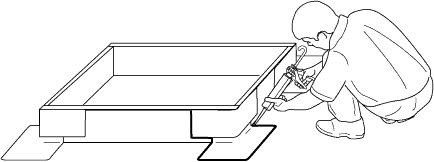
STEP 15: Caulk around the molded corners
and
Laminate Tape with Silicone Caulk for EPDM.